








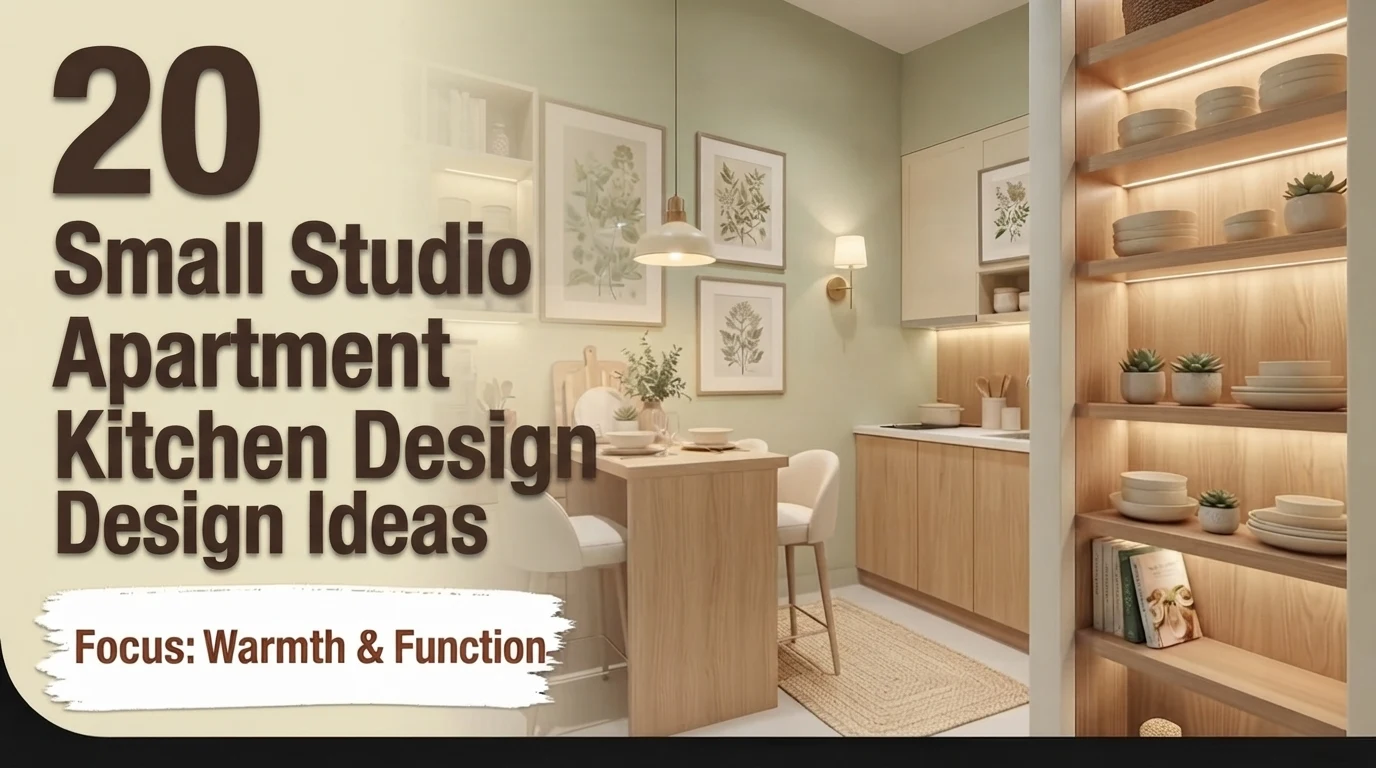
When curating your space, selecting the right studio apartment kitchen is essential for optimizing architectural proportion, everyday comfort, and aesthetic harmony. Living in a micro-apartment usually means cooking in a space no bigger than a coat closet.
Finding practical small kitchen ideas for studio apartment layouts turns a frustrating single-wall footprint into a surprisingly capable cooking zone. Here is how I make tiny kitchens work hard without cluttering your living area.
Overview of Modern Studio Apartment Kitchen Solutions
1. Ceiling-Height Stacked Cabinets
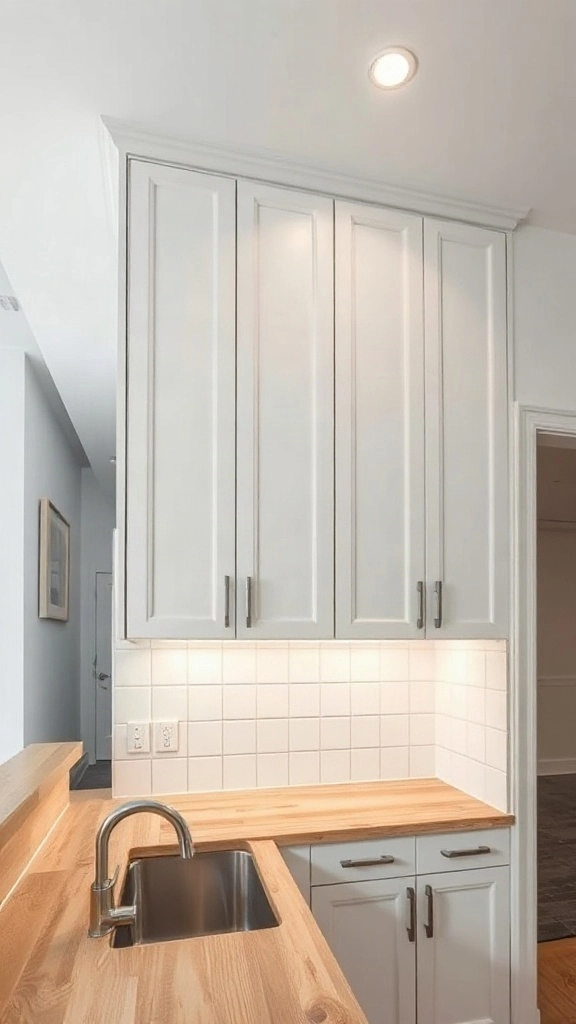
Dead space above wall cabinets drives me crazy. In a studio, leaving that 12-inch gap near the ceiling is a wasted opportunity. Build upper cabinets straight to the soffit. Put seasonal items, holiday platters, and back-stock paper towels on that top tier. It visually lifts the room, making your studio feel taller than it actually is.
When planning this layout, keep the top row of doors simple and handleless. Touch-latches keep visual noise to a minimum near the ceiling. If you want to review full balance principles, explore our guide on ideal kitchen layout options before ordering custom millwork.
💡 Pro Styling Move:
Paint the upper cabinet doors the exact same color as your wall paint. The cabinets blend into the drywall, removing visual weight.
2. Two-Burner Induction Cooktop Swap
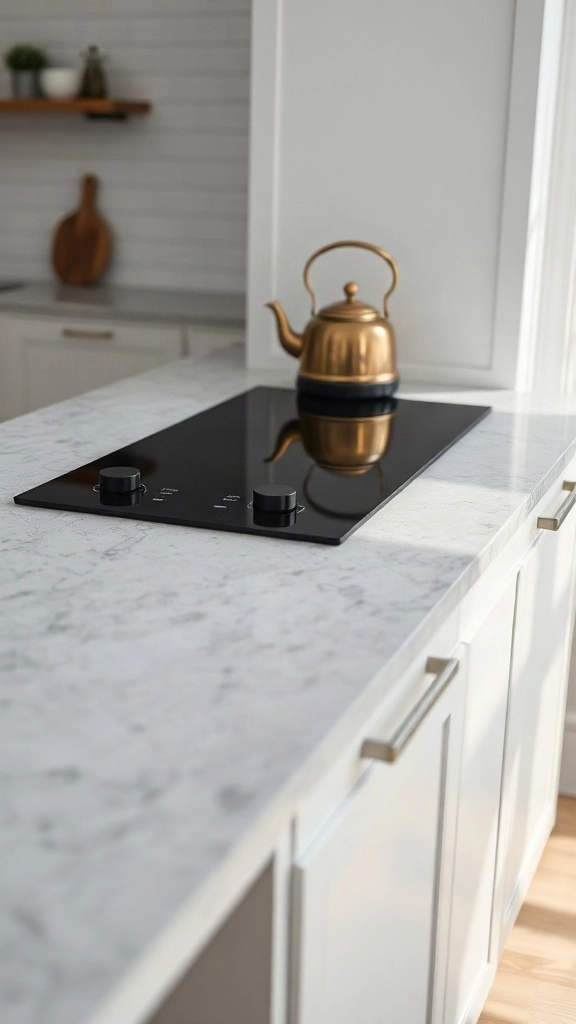
Most people cook on two burners max. Installing a massive four-burner range in a 400-square-foot flat eats up precious prep space. I always swap standard ranges for a sleek 12-inch or 15-inch two-burner induction top. You gain 12 to 18 inches of usable counter space overnight. Counter prep area is king in a studio flat.
Induction cooks fast and cools down quickly. That means your cooktop doubles as a usable landing pad for cutting boards moments after turning off the heat. Keep your pans flat-bottomed for proper magnet connection.
⚠️ Where People Go Wrong:
Buying standard electrical radiant tops instead of induction. Standard glass tops retain heat for 20 minutes, preventing you from using that counter space safely.
3. Integrated Panel-Ready Mini Appliances
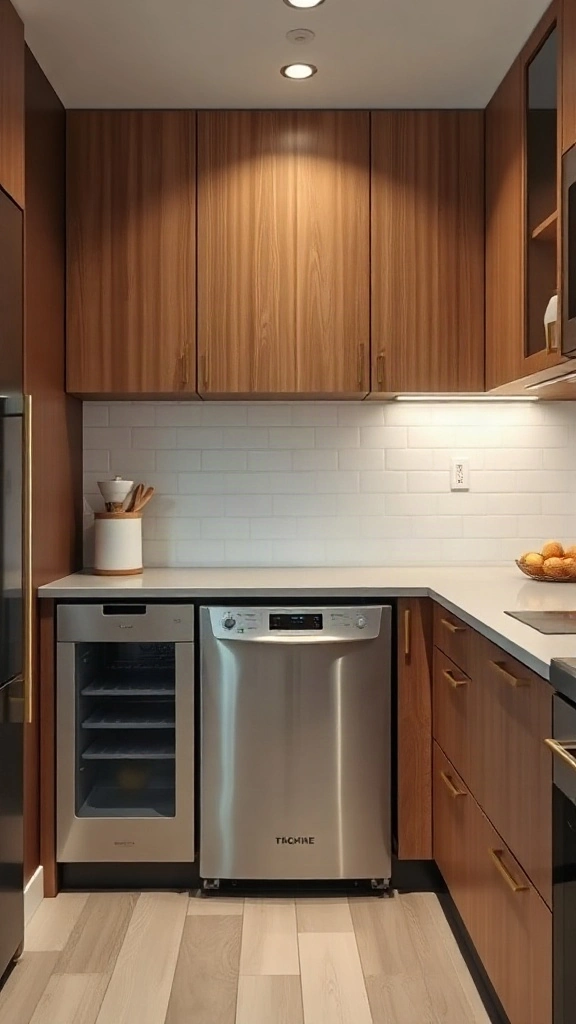
Seeing a wall of cold stainless steel from your bed isn’t relaxing. A small kitchen for studio flat spaces feels unified when you hide appliances behind matching cabinet doors. Panel-ready 18-inch dishwashers and 24-inch column fridges merge straight into your cabinetry run. The kitchen stops screaming ‘kitchen’ when you are sitting on the sofa.
I recommend this approach for anyone who values a quiet visual environment. For paint pairing ideas across different aesthetics, check out our comprehensive interior design styles list to align cabinet wood tones with your main living area.
💡 Pro Styling Move:
Match your panel cabinet hardware with your main studio wardrobe handles. It reinforces cohesion across the whole open room.
4. Under-Cabinet Magnetic Wall Strips
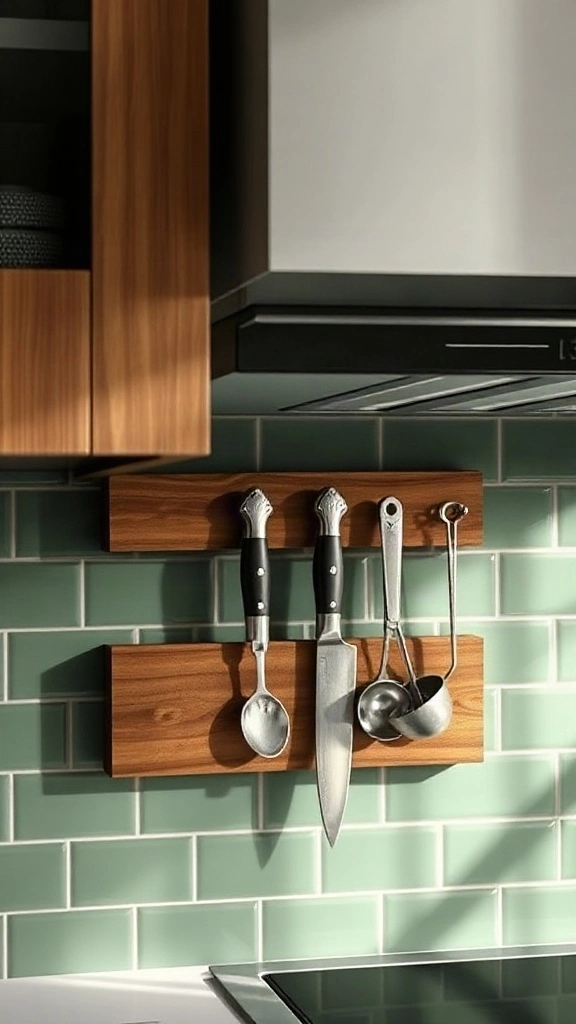
Countertop knife blocks take up valuable square inches. Mount heavy-duty magnetic walnut or steel strips right along the backsplash or under upper cabinets. Hang your daily chef knife, shears, and steel measuring spoons off the counter entirely. It keeps tools handy while chopping vegetables.
Safety matters here. Buy high-gauss neodymium magnets so heavier blades never slide down when you close cabinet doors nearby. It keeps your workspace uncluttered.
⚠️ Where People Go Wrong:
Mounting magnetic strips right next to the cooktop burner zone. Oil splatters coat every knife blade during frying, creating extra cleanup work.
5. Rolling Butcher Block Prep Cart
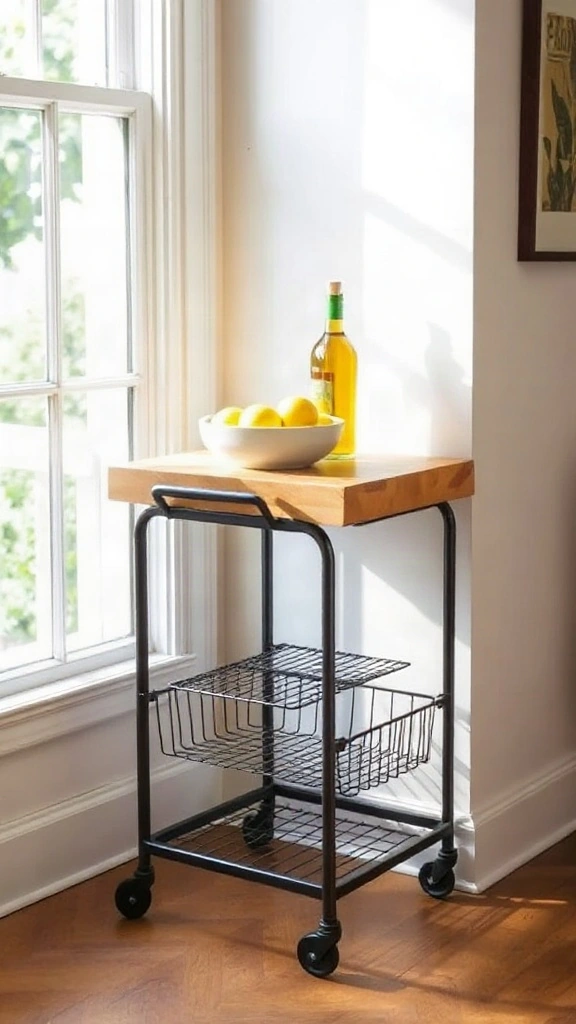
Fixed islands ruin traffic flow in micro-flats. A heavy-duty butcher block cart on locking casters gives you prep space right where you need it, then tucks away against an empty wall when guests walk in. I tested this in a 320-square-foot studio and it changed Sunday meal prepping completely.
Look for carts with an open bottom wire rack. That lower shelf holds Dutch ovens or mixing bowls without blocking floor light. Measure your entry doorway clearance before ordering.
💡 Pro Styling Move:
Treat the wood top with food-grade mineral oil twice a month. It resists moisture stains and looks rich next to soft seating.
6. Glass-Front Upper Cabinetry
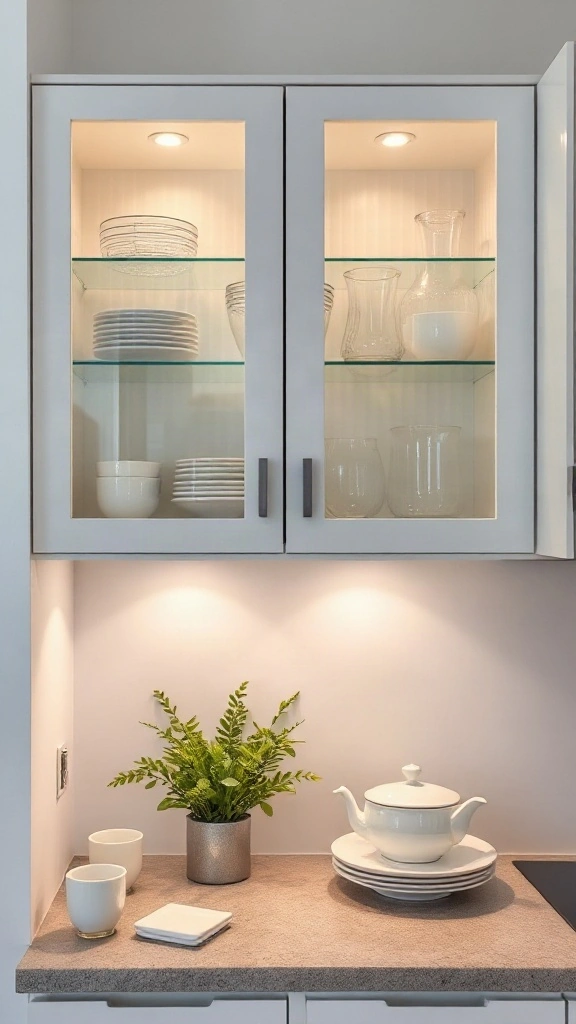
Solid upper cabinet doors on both sides of a small room create a tunnel feeling. Replacing solid fronts with reeded or clear glass doors breaks up dense wood masses. Light bounces inside the cabinet boxes, bouncing back out into your room. It creates instant depth.
Keep the contents neat inside glass cabinets. Curate stackable everyday mugs, glass jars, and uniform dinner plates. If you struggle with organizing tiny vertical spaces, similar logic applies when arranging towel storage for small bathroom space in compact apartments.
💡 Pro Styling Move:
Use ribbed or fluted glass if you don’t want your spice collection fully exposed to guests sitting across the room.
7. Deep Single-Bowl Undermount Sinks
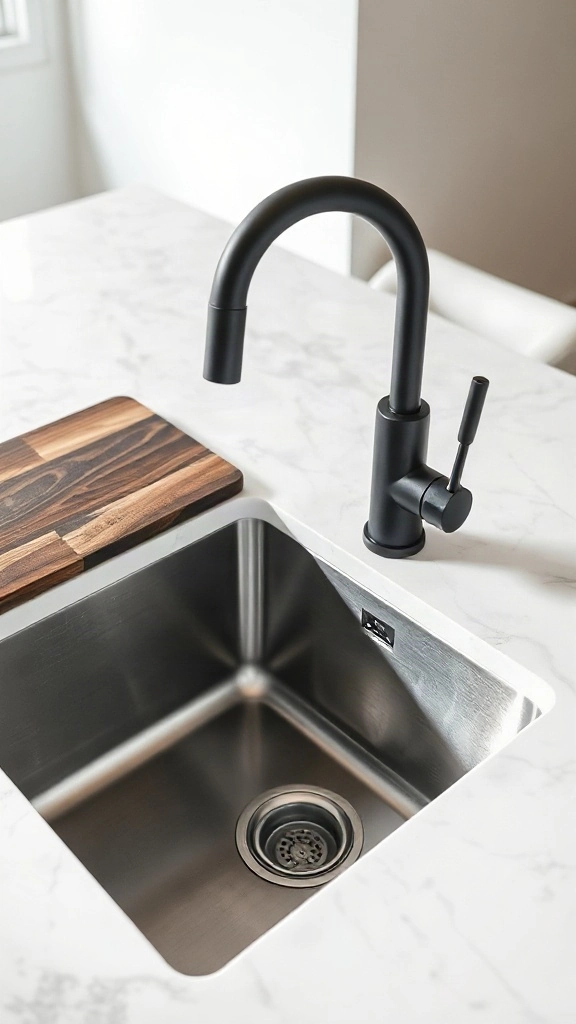
Double-bowl sinks are a huge mistake in small narrow galley kitchen ideas. Two tiny basins can’t fit a standard sheet pan flat. Go with a single, deep 21-inch undermount basin instead. You can drop a large skillet right to the bottom and hide dirty lunch dishes out of eye level when friends stop by unexpected.
Pair deep sinks with high-arc pull-down faucets. According to recent kitchen layout breakdowns featured on Architectural Digest project features, deep single-basin setups maximize horizontal counter utility while maintaining clean lines.
⚠️ Where People Go Wrong:
Choosing top-mount drop-in sinks with lip frames. They trap crumbs on the counter edge and reduce flush wiping space.
8. Counter-Height Peninsula Dividers
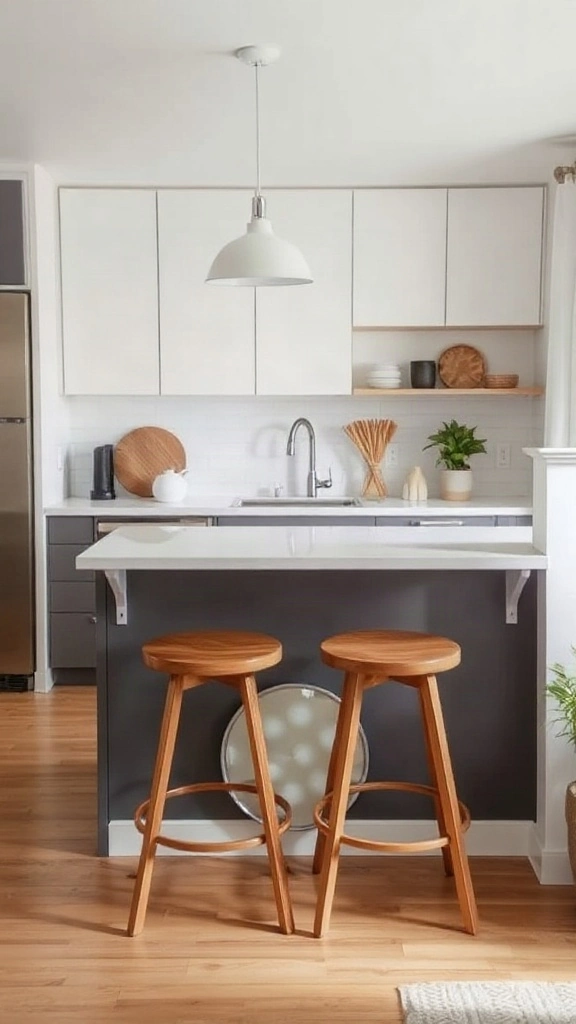
If your studio layout allows a short return wall, add a 48-inch peninsula. It creates a physical border between your sleeping area and your kitchen. It gives you prep space, a desk for laptop work, and a dining spot for two without taking over floor space like a full dining table.
Keep the counter overhang at least 12 inches depth so your knees don’t bang against the cabinet panel while eating breakfast. Tuck backless stools fully underneath when not in use.
💡 Pro Styling Move:
Install double power outlets on the living-room side of the peninsula base to charge devices easily from your sofa.
9. Pocket Doors for Full Concealment
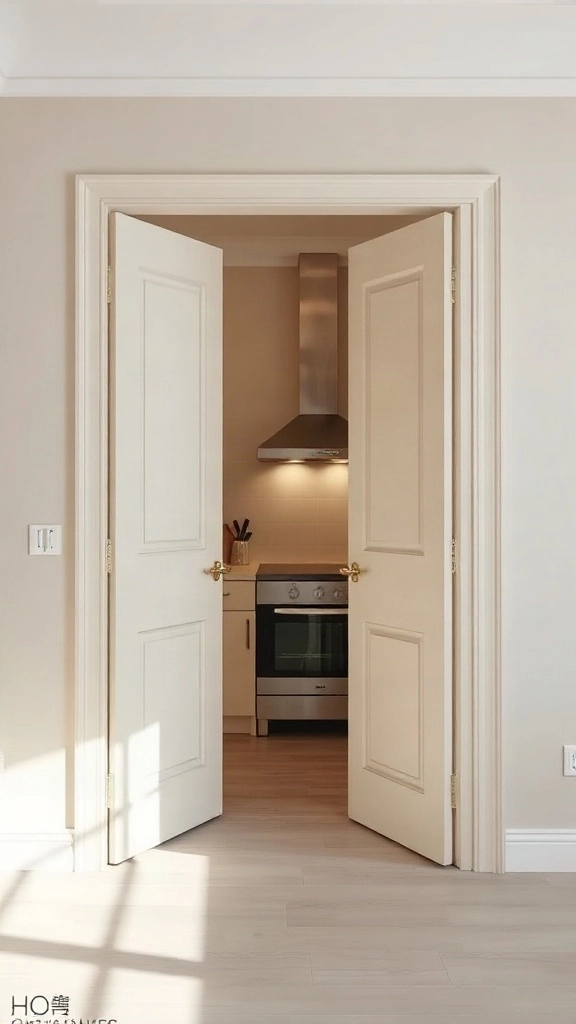
For total control over studio atmosphere, slide your entire kitchen behind pocket doors or folding bi-fold panels. When cooking is finished, pull the doors shut. The kitchen vanishes, leaving your main room calm and free from visible cooking gear.
This requires careful planning during a renovation, but it yields incredible peace of mind in 250-square-foot layouts. Paint the door face in muted tones like those found in Benjamin Moore paint color recommendations for cohesive walls.
⚠️ Where People Go Wrong:
Forgetting ventilation. Always install a powerful recirculating or ducted range hood inside enclosed cabinet nooks so steam escapes properly.
10. Wall-Mounted Metal Pegboards
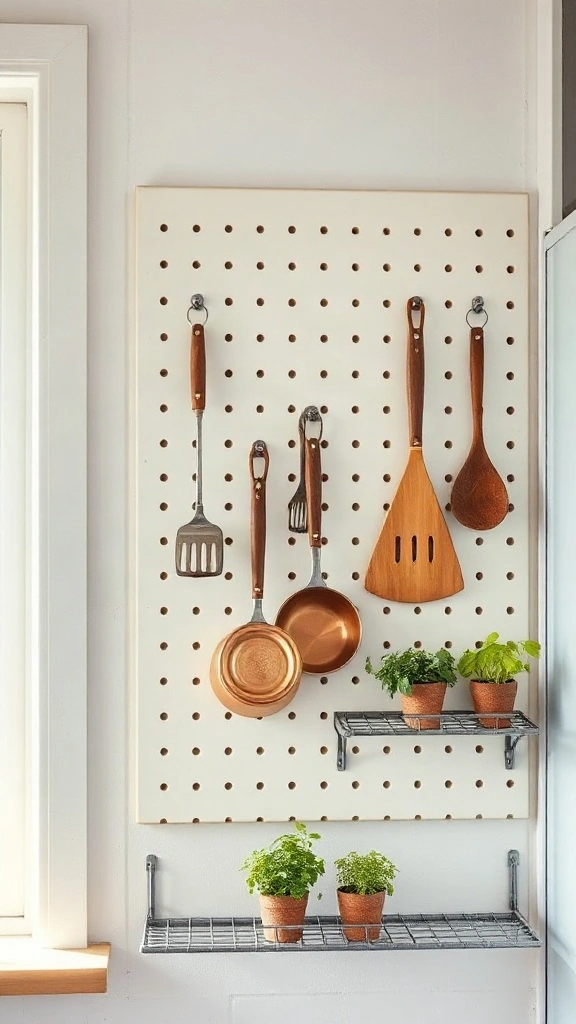
Don’t let blank wall end-caps go unused. A powder-coated steel pegboard turns vertical surfaces into adaptable storage. Hang pots, strainers, ladle spoons, and small spice shelves using sturdy metal hooks. You can adjust the layout whenever you buy new cook tools.
It brings a industrial cook-space feel while keeping lower drawers free for utensils and silverware. Keep items grouped by handle material for a clean look.
💡 Pro Styling Move:
Stick to a single metal finish for all hooks and hung cookware. Mixing chrome, brass, and plastic creates instant visual noise.
11. Antiqued Mirror Tile Backsplashes
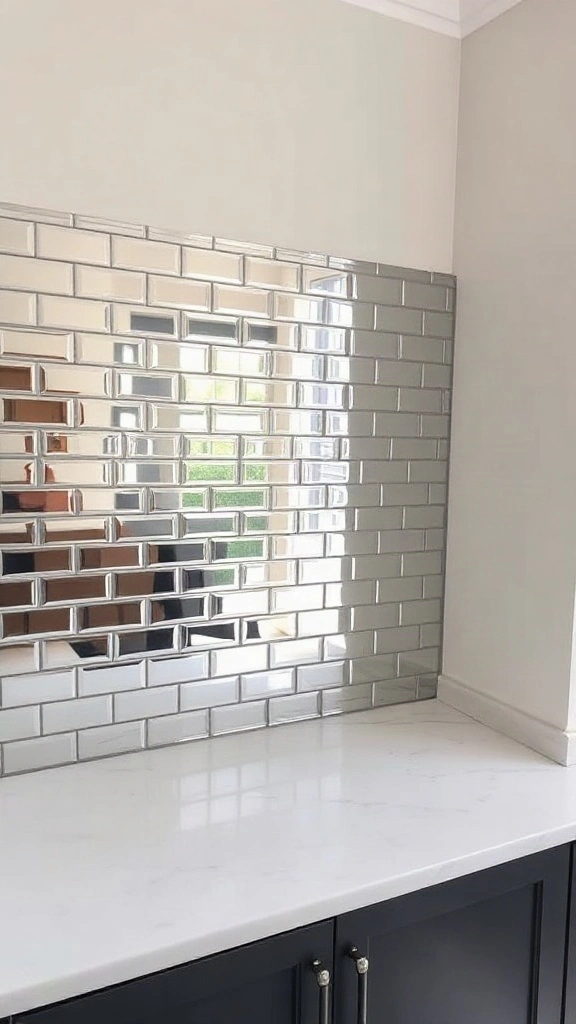
Mirror backsplashes double the perceived depth of a narrow single-wall kitchen. Standard clear glass mirrors look too clinical, but antiqued silvered mirror tiles add texture while softening reflections. Light bounces directly into dark corners, making the cooking zone feel twice as wide.
Wipe mirror tiles down using a microfiber cloth and standard glass cleaner after cooking bacon or sautéing veggies. The antiqued finish naturally hides minor water spots between deep cleans.
💡 Pro Styling Move:
Run mirror tiles continuously from counter base straight up under upper cabinets without thick grout lines for maximum reflection.
12. Ultra-Slim Base Pull-Out Pantries
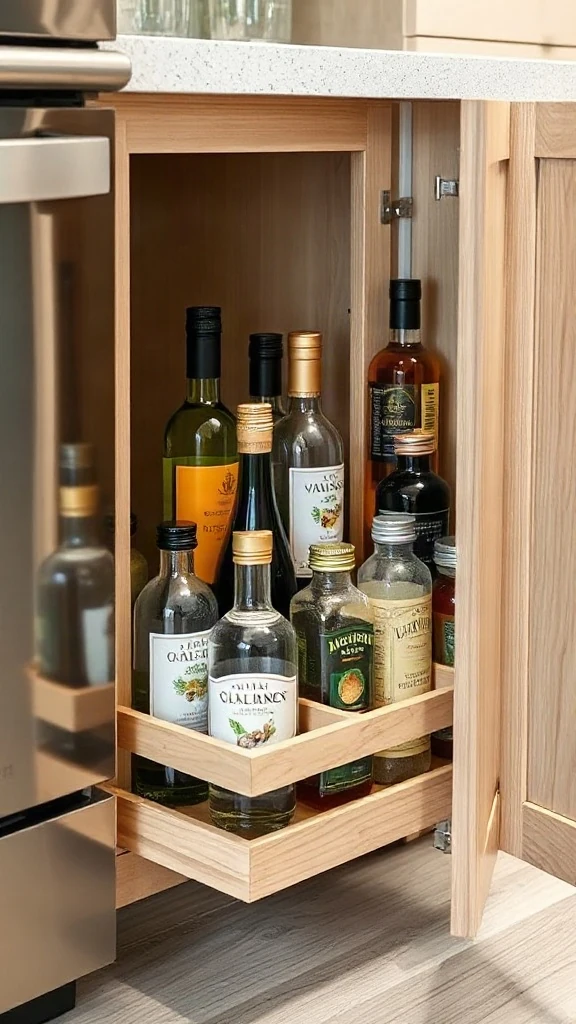
That awkward 6-inch space beside your range shouldn’t sit empty with filler molding. Install a vertical pull-out pantry rack instead. On smooth ball-bearing glides, a 6-inch cabinet holds oil bottles, vinegars, baking cans, and spices in a organized single row.
Everything stays reachable from both sides without digging into the back of deep cupboards. It’s one of my favorite functional upgrades for tight galley kitchens.
13. Floating White Oak Shelves with Recessed Linear LEDs
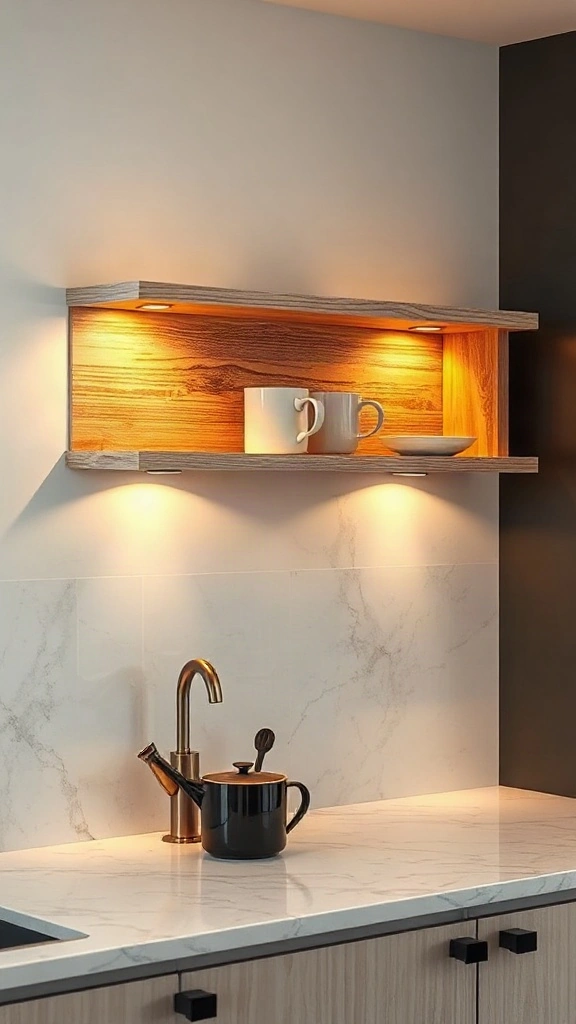
Upper cabinets can crush a tiny studio flat. When we removed bulky uppers in an East Village studio, the space breathed instantly. Total visual relief. The owner worried about dark prep corners, so we routed warm 2700K linear channels directly into solid white oak planks. It actually works. The kitchen transformed from a dark cave into an open architectural feature overnight.
Mount heavy-duty steel brackets directly into wall studs to support 10-inch-deep solid wood shelves. Keep 15 inches of vertical clearance between shelves for tall glassware and stoneware. Route micro-channel diffusers along the bottom edge so light washes downward smoothly without any visible glare points from the living area.
💡 Pro Styling Move:
Wire the LED shelf channels to a smart wall dimmer so you can transition the kitchen illumination to soft ambient cocktail lighting when hosting in the studio.
14. Integrated Over-Sink Walnut Cutting Board Ledges
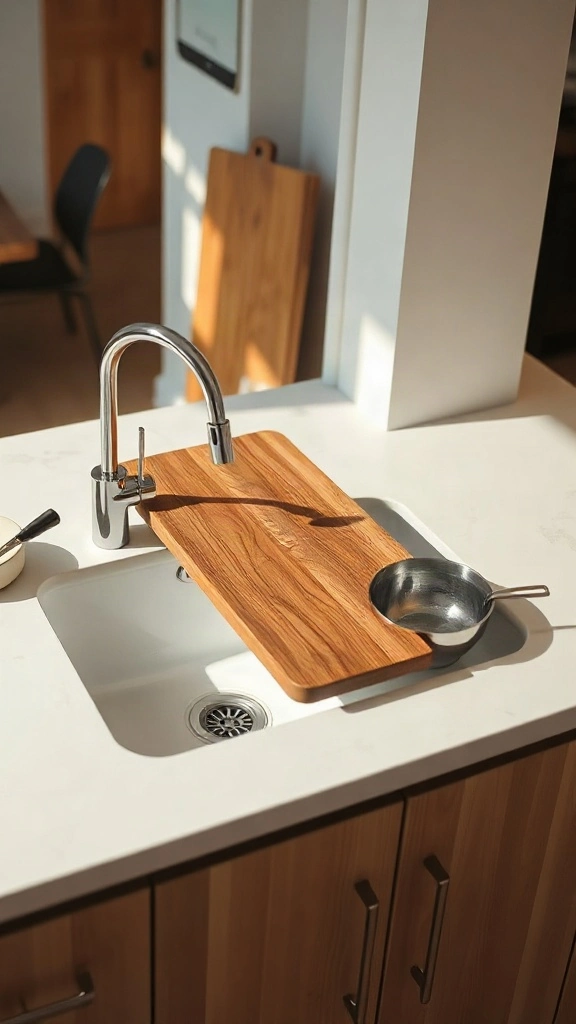
Prep space vanished the moment our client set down a toaster. Classic studio dilemma. Instead of sacrificing valuable counter space, we converted the sink basin into an active prep zone using a stepped workstation sink. Pure culinary efficiency. You chop fresh herbs directly over the basin and slide vegetable trimmings right into the compost bin without dirtying the perimeter.
Select an undermount sink featuring an integrated interior reveal track, ideally measuring 27 inches wide. Pair it with a custom 1.25-inch oiled American walnut cutting board designed to slide horizontally across the rim. This recaptures nearly three square feet of functional food-preparation surface when counter dimensions run tight.
⚠️ Where People Go Wrong:
Using cheap composite inserts that warp from moisture. Stick to end-grain hardwood or dense food-safe richlite boards treated regularly with food-grade mineral oil.
15. Wall-Mounted Fold-Down Drop Leaf Countertops
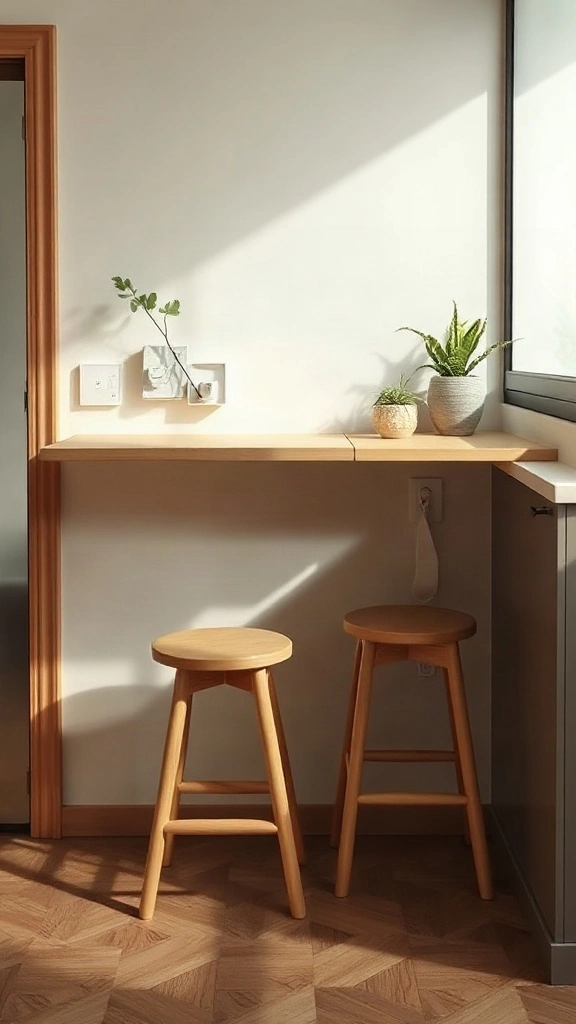
Permanent dining tables swallow studio square footage ruthlessly. No question about it. For a tight 320-square-foot loft, we engineered a fold-down birch leaf that sits flush against an unused plaster wall. Up for meals. Down for bedtime. It converts from a secondary baking counter to a two-person bistro table in roughly three seconds flat. Absolute huge upgrade.
Install heavy-duty spring-loaded folding shelf brackets rated for at least 150 pounds, mounted firmly to structural wall framing. Size the tabletop between 30 and 36 inches wide with a 20-inch projection. When folded, maintain a slim profile extending no more than two inches outward into the studio circulation path.
💡 Pro Styling Move:
Hang a sculptural framed art print directly above the folded slab so the dropped tabletop looks like a deliberate architectural plinth rather than utility furniture.
16. Modular Unlacquered Brass Utility Wall Rails
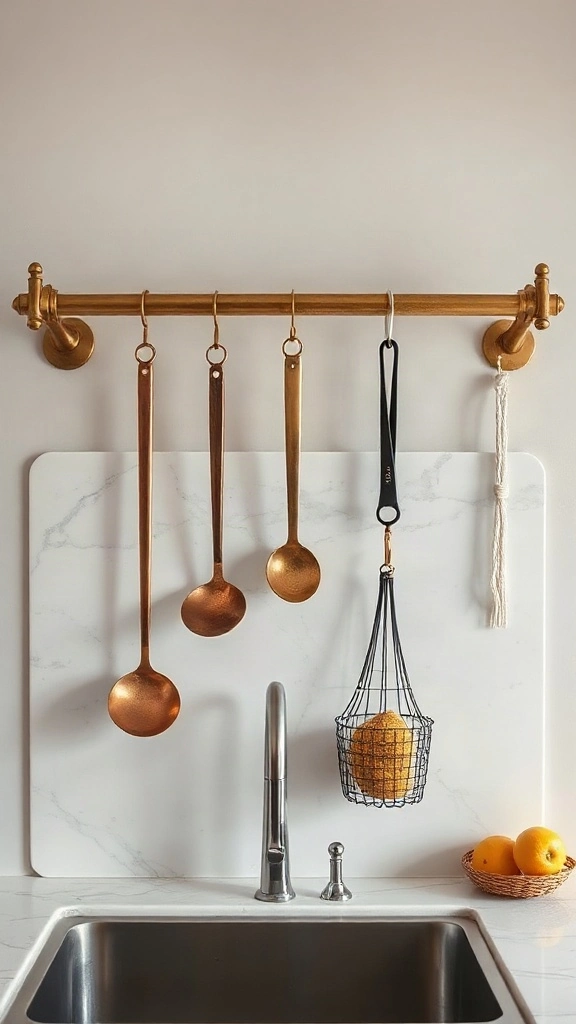
Cramming every utensil into a solitary shallow drawer causes constant jamming. Big mistake. We mounted a continuous brass railing spanning the backsplash in a compact Parisian-style studio. Everything sits at hand. Copper skimmers, linen tea towels, and everyday shears hang suspended right above the stove. It cleared out the drawer and introduced rich, living patina to sterile cabinetry.
Position an 18mm solid brass rail exactly 4 to 6 inches above the countertop or directly underneath upper shelving. Use matching S-hooks and hanging wire baskets for garlic bulbs and salt cellars. Restrict the depth of hanging accessories to under 4 inches so they never encroach on prep space.
⚠️ Where People Go Wrong:
Overcrowding the rail with bulky heavy pans that clang against the wall. Limit hooks to everyday tools and light utensils to prevent chaotic visual clutter in plain sight.
17. Concealed Toe-Kick Plinth Drawers
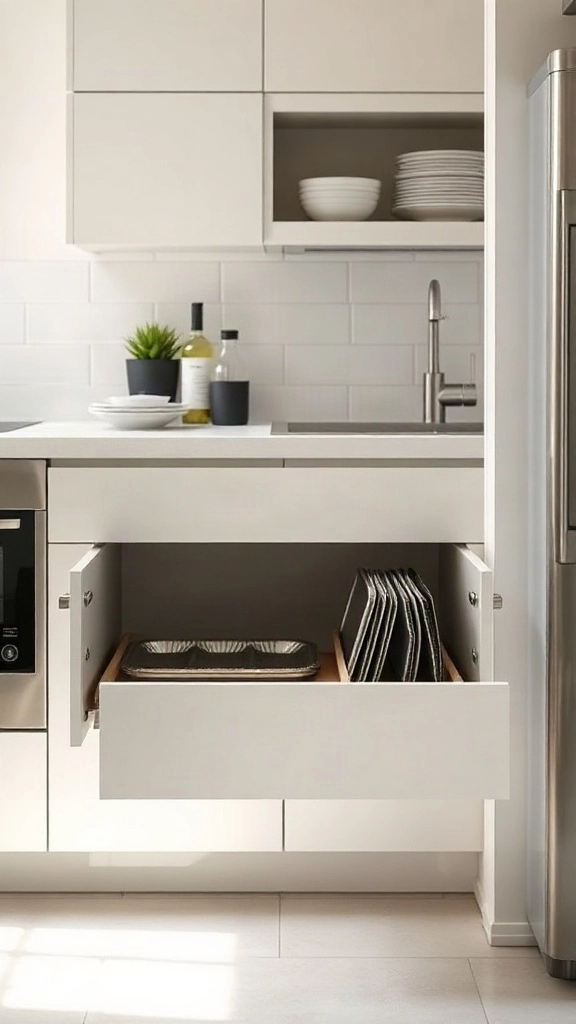
Standard toe-kicks waste four vertical inches across the entire cabinet footprint. Total design oversight. During a full studio overhaul, we convinced the carpenter to install push-to-open drawer hardware in the plinth base. Hidden storage unlocked. Flat sheet pans, oversized platters, and specialty griddles now tuck away beneath the lower cabinets completely undetected. Nobody even guesses they exist.
Specify 4-inch-high, heavy-duty push-latch drawer runners designed to carry up to 50 pounds across a 24- to 30-inch cabinet width. Match the drawer face veneer smoothly to your recessed baseboard trim. Ensure clearance of at least 3/8-inch above finished flooring to avoid dragging across thick rugs.
💡 Pro Styling Move:
Add acoustic velvet or felt drawer liners inside the toe-kick boxes to eliminate metal-on-wood clatter when tapping the drawers open with your foot.
18. Monochromatic Paint Drenching Across Millwork and Walls
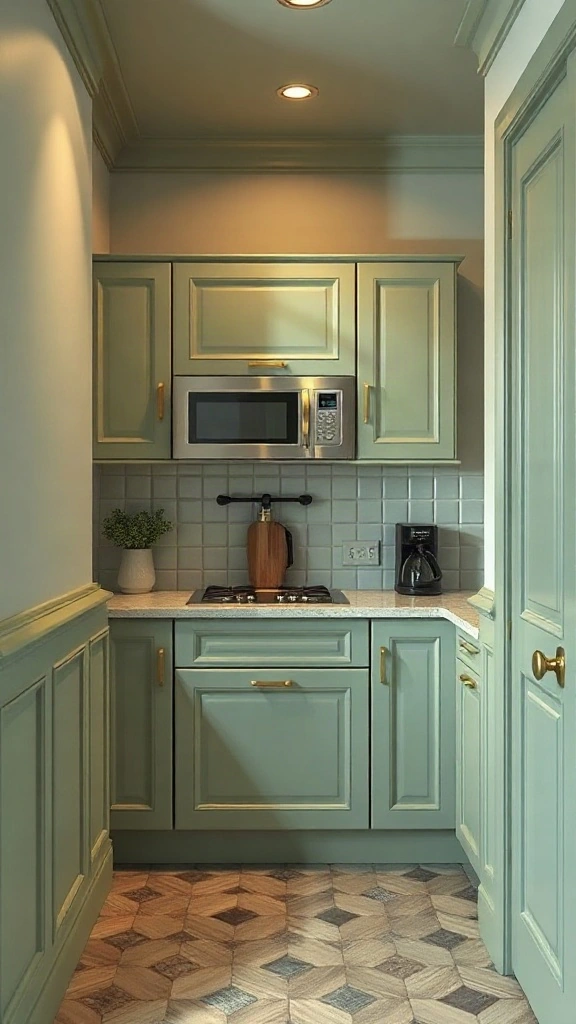
High-contrast color breaks chop an open studio into messy visual fragments. It feels suffocating. By color-drenching an entire studio kitchenette in a velvety, muted moss tone, the hard edges dissolved. Boundaries simply melted away. The eye travels smoothly across the cabinetry and surrounding walls as one cohesive architectural volume, making the compact cooking envelope feel deliberate and grounded.
Coat your cabinetry, baseboards, door casing, and adjacent drywall in the exact same color code. Use an easy-clean satin or semi-gloss finish for the woodwork and cabinets, and apply a matching low-sheen washable matte formulation across the drywall to maintain practical durability without breaking optical unity.
⚠️ Where People Go Wrong:
Drenching with overly stark bright white, which reflects harsh shadows and reveals every seam. Lean toward grounded earthy tones like warm putty, olive, or soft greige instead.
19. Corner Tambour Appliance Garages
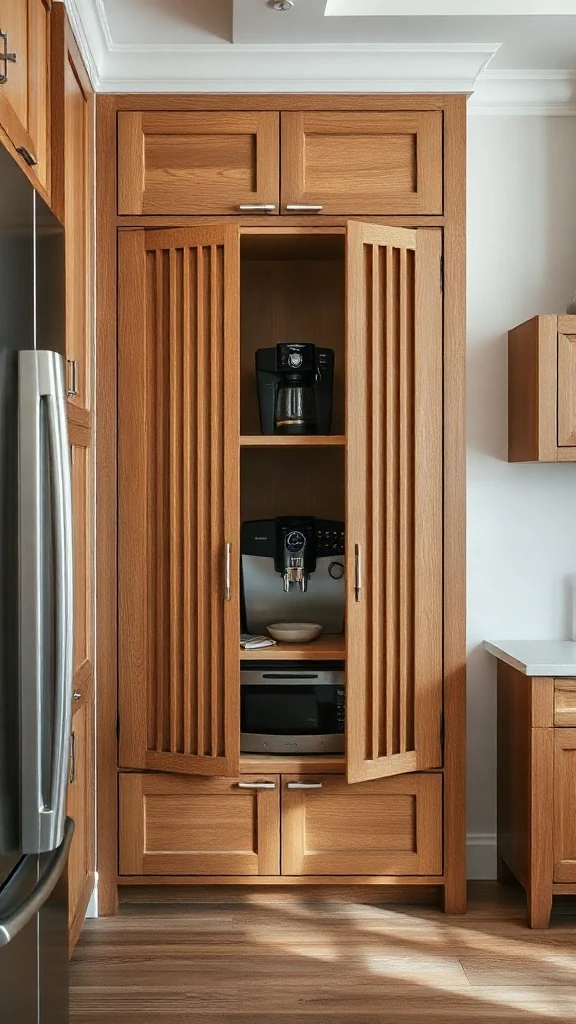
Small appliances left on display destroy calm in an open studio apartment. You see them from bed. In an awkward dead corner, we built a vertical fluted tambour garage that glides open on whisper-quiet tracks. Mess vanishes instantly. The espresso machine, bean grinder, and kettle live plugged in, concealed behind textured timber until breakfast time arrives.
Dedicate a 16-by-16-inch dead corner atop your counter run. Install an internal quad electrical outlet inside the cabinet box and use a roll-up slatted tambour track system. This lets you access your appliances effortlessly without swinging cabinet doors open into your limited walkway or hitting faucet handles.
💡 Pro Styling Move:
Incorporate an automatic micro-switch interior light that activates as soon as the tambour rolls upward, giving the functional garage an upscale hotel hospitality feel.
20. Fluted Glass Half-Height Spatial Screens
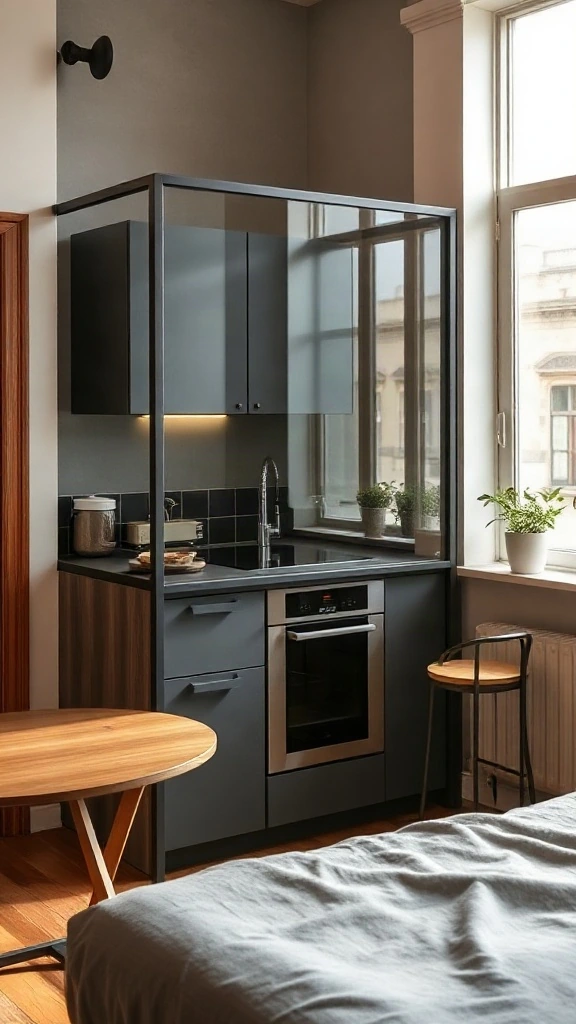
Staring at dirty sauté pans while falling asleep ruins any studio sanctuary. A solid partition wall, however, kills natural daylight. Bad idea. We fabricated a slender steel-and-fluted-glass screen at the counter edge instead. It works like magic. Diffused light pours through unhindered, but dirty dishes and kitchen clutter become completely blurred, separating sleep from dinner prep.
Construct a 42- to 48-inch-high partial partition anchored to the counter end or ceiling joists. Opt for 3/8-inch reeded or ribbed tempered glass set within a slender 1-inch blackened steel or extruded aluminum profile. This establishes strict acoustic and visual zones without stealing daylight from nearby exterior windows.
⚠️ Where People Go Wrong:
Using clear glass panels that show every splatter and grease smudge. Reeded, fluted, or frosted textures obscure kitchen silhouettes and cut down on cleaning maintenance dramatically.
Master Comparison: Key Approaches at a Glance
| Approach / Style | Best For | Space Requirement | Estimated Cost | Key Styling Pro Tip |
|---|---|---|---|---|
| Vertical Ceiling Run | High ceilings & vertical storage | 0 sq ft floor space | $$ – $$$ | Keep top doors solid to hide seasonal clutter. |
| Slim Appliance Kit | Extreme micro-apartments | 18-inch base cabinet widths | $$$ | Panel-ready fronts hide cold steel appliances. |
| Peninsula Room Divider | Defining living vs cooking zones | 4×2 feet floor footprint | $$ | Use backless counter stools that slide completely under. |
| Concealed Pocket Doors | Ultra-minimal studio flats | 6-8 linear wall feet | $$$$ | Paint door exteriors the exact wall color. |
| Mobile Prep Station | Renters with zero counter space | 2×2 feet movable footprint | $ | Lock wheels during chopping to prevent drifting. |
⚠️ Where People Go Wrong:
Storing heat-sensitive oils directly next to an uninsulated oven wall inside cheap pull-outs. Ensure your stove cabinet base has proper heat shielding.
Frequently Asked Questions
How do I optimize a single-wall kitchen layout in a studio apartment?
Focus on vertical space and multi-functional surfaces. Stack upper cabinets directly to the ceiling for items you use rarely. Install an undermount sink with a custom cutting board insert to create extra prep space over the sink basin when needed.
What is the minimum recommended space for a small narrow galley kitchen?
Maintain at least 36 inches of clear walkway width between opposite counters or walls. This permits cabinet doors to open fully while letting you pivot comfortably while cooking without stubbing toes or hitting hips.
Are full-sized appliances viable in studio apartments?
Usually no. Full-size 36-inch refrigerators and 30-inch ranges consume precious counter width. Opt for 24-inch panel-ready refrigerators and 18-inch dishwashers to gain up to two feet of prep counter space.
How do I handle cooking smells in an open studio space?
Invest in a high-CFM range hood with charcoal filters if ducting outside isn’t allowed by your landlord. Always turn the fan on two minutes before starting high-heat cooking to establish airflow early.
Conclusion & Styling Takeaways
Designing a tiny kitchen isn’t about giving up your culinary habits; it comes down to intentional choices. Emphasize vertical space, pick slim appliances that work hard, and keep counter surfaces free of visual clutter. Pick two or three adjustments from this guide and watch your studio cook space transform overnight. Share your updated setup pins on Pinterest or explore more layout guides on cosyneststudio.com to complete your room transform!